Some links on this page are affiliate links. If you buy through them I may earn a commission, at no extra cost to you. It never changes a rating. Read the disclosure
- Most hosts include a domain free for year one and install WordPress for you.
- Set permalinks to Post name before your first post; changing them later needs redirects.
- Make sure "Discourage search engines" in Settings → Reading is unticked.
- Start with a free, fast theme and four or five plugins, not twenty.
- Give every image alt text, pick one category and preview before you publish.
This guide shows how to start a WordPress blog click by click: buying hosting and a domain, installing WordPress, finding your way around the dashboard, the settings to change on day one, choosing a theme, adding a few plugins, creating your About, Contact and Privacy Policy pages, building a menu, and writing and publishing your first post in the block editor. Plan on an afternoon. Every menu name below was checked against WordPress 7.1.3, the current version on 12 October 2026, and against WordPress.org’s own documentation.
I’ve built websites and worked with WordPress since 2006 and have worked on more than 500 web projects since then, from small blogs to stores and large content sites. The order below is the one I use on every new blog, because doing the settings before the first post saves you from fixing addresses and pages later.
If you haven’t yet decided on a niche or a platform, start with our guide on how to start a blog, which covers goals, niches, platforms and your first ten posts. This page assumes you’ve chosen self-hosted WordPress (WordPress.org); if you’re not sure what that means, read what WordPress is and how it works first.

How long it takes and what it costs
You can have a working blog in about an afternoon. The table shows where the time and money go, using prices checked on the official pages on 12 October 2026.
| Step | Time | Cost |
|---|---|---|
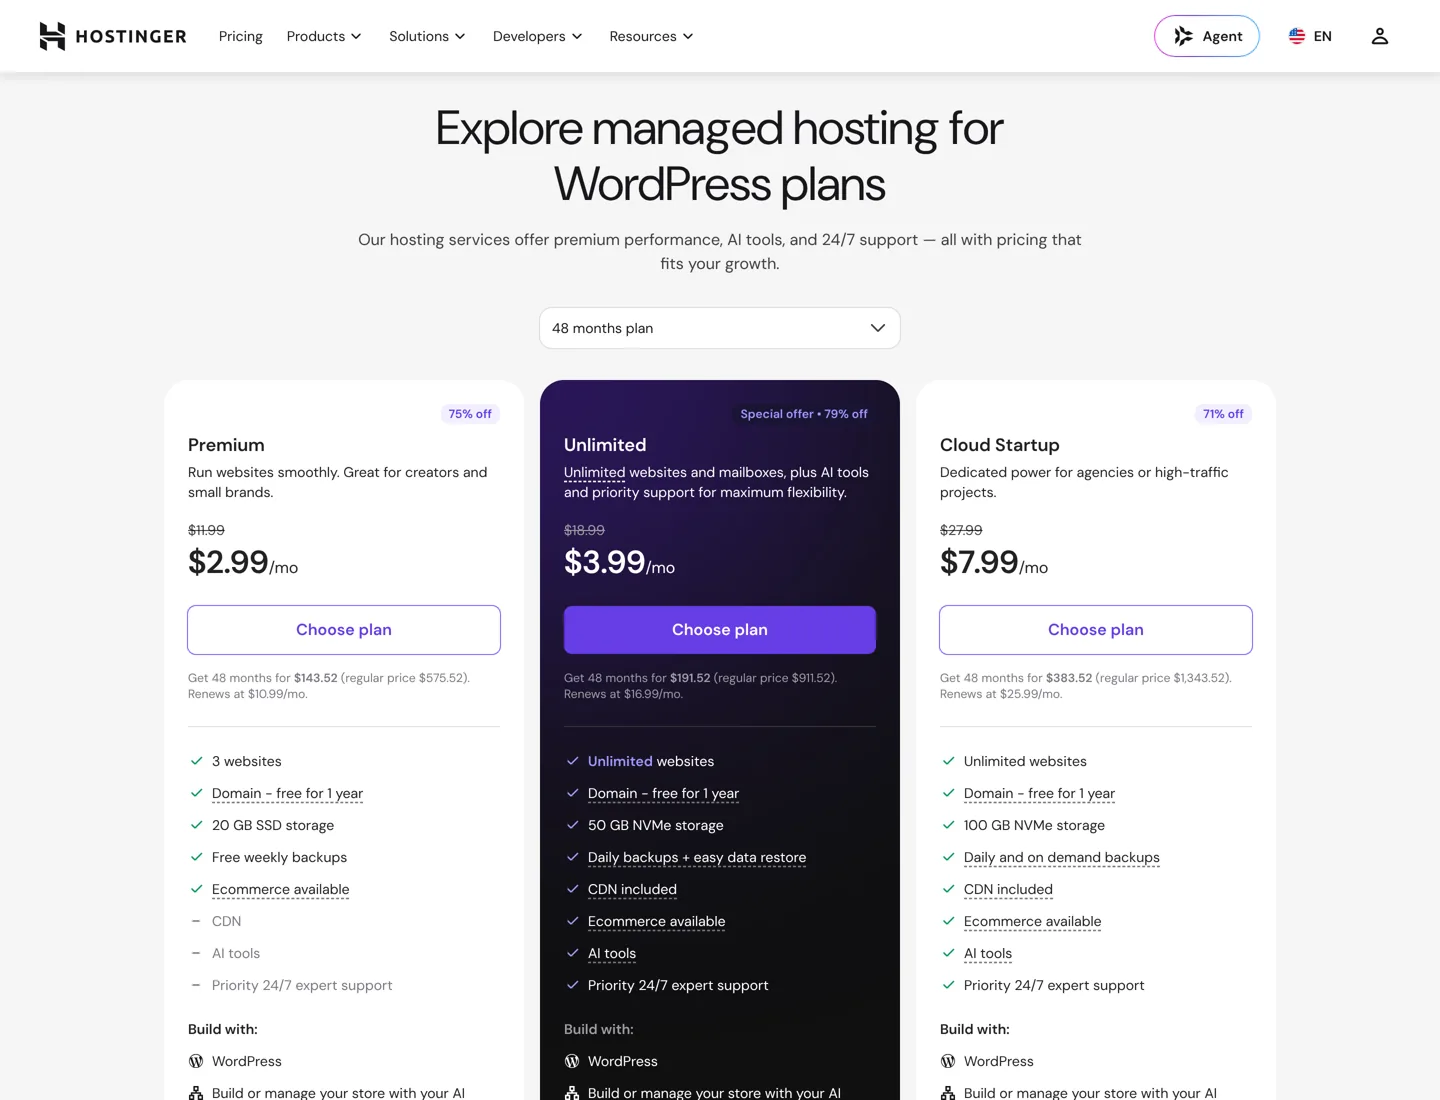
| Hosting and domain | 15 minutes | Budget example: Hostinger Premium, $2.99 a month on a 48-month term ($143.52 up front), renews at $10.99 a month; domain free for the first year |
| Install WordPress | 5 to 20 minutes | Free (WordPress is free, open-source software) |
| Dashboard and settings | 20 minutes | Free |
| Theme | 20 to 40 minutes | Free themes are enough to start |
| Plugins | 20 minutes | Free versions cover the basics |
| Pages and menu | 45 minutes | Free |
| First post | 1 to 3 hours of writing | Free |
So a budget WordPress blog can cost about $36 a year for the first four years on a long hosting term, plus the domain’s renewal from year two. The times are my own estimates for someone doing it the first time.
Step 1: Buy hosting and a domain
A self-hosted WordPress blog needs two things you pay for: a domain (your address, such as yourblog.com) and hosting (the server your site runs on). The simplest route for a first blog is to buy both in one place, because most WordPress hosting plans include a domain free for the first year and set WordPress up for you.
WordPress.org recommends hosting with PHP 8.3 or greater, MySQL 8.0 or greater (or MariaDB 10.11 or greater) and HTTPS support. Every mainstream host meets these. If you want help choosing, our guide to what WordPress hosting is explains the types, and our rankings of the cheapest WordPress hosting and the best WordPress hosting compare real plans.
The sign-up looks much the same at every host. Using Hostinger‘s WordPress hosting as the example:
- Choose a plan. One website is all you need; the entry plan is fine for a new blog.
- Choose the billing term. The low monthly price usually needs a long term paid up front. Note the renewal price before you pay: on Hostinger’s Premium plan it’s $2.99 a month for 48 months, then $10.99 a month.
- Create your account and pay.
- Claim your free domain in the onboarding steps, or connect a domain you already own. If you’re unsure what to call the blog, our guide on using your own name as a domain weighs up that option.
- Choose WordPress when the host asks what you want to build. Most hosts then install it for you.
You can also buy the domain separately from a registrar such as Namecheap (see our Namecheap review) and point it to your host. That keeps the domain in a separate account, which some people prefer, but it adds a step for a first blog.
Step 2: Install WordPress
Most hosts install WordPress during sign-up, or give you an “Install WordPress” button or a one-click installer such as Softaculous in the control panel. You choose the domain, an admin username (never “admin”), a strong password and your email, and the site is ready in a few minutes. Our guide to installing WordPress covers every method, including a manual install and fixes for common errors, so I won’t repeat it here.
Two things to check before you move on: the site loads at https:// (most hosts include a free SSL certificate), and, if the installer shows a “Discourage search engines” box, it is unticked.
Step 3: Log in and learn the dashboard
Log in at yourdomain.com/wp-admin. You land on the Dashboard, which by default shows five widgets: Welcome, At a Glance (your post, page and comment counts, plus the WordPress version and active theme), Activity, Quick Draft, and WordPress Events and News. The Screen Options tab at the top hides the ones you don’t use.

The menu on the left is where everything lives. You’ll use these items most:
- Posts: your blog articles, plus Categories and Tags.
- Media: every image and file you upload.
- Pages: standalone pages such as About and Contact.
- Comments: approve, reply to or delete comments.
- Appearance: themes, plus the Editor (for block themes) or Menus and Customize (for classic themes).
- Plugins: add, activate and update plugins.
- Users: your profile and anyone else who writes for the blog.
- Tools: import, export and Site Health.
- Settings: the site-wide options in Step 4.
Clean up first. A new install comes with a “Hello world!” post, a “Sample Page” and a draft “Privacy Policy” page. Delete the first two (Posts and Pages, hover, Trash), and keep the privacy draft for Step 7. Then open Users → Profile, add your first and last name, and choose them under “Display name publicly as”, so your posts show your name instead of your login username.
Step 4: Change these WordPress settings before you publish
Four settings screens matter on day one. Change them now, before your first post, because some of them (permalinks especially) are awkward to change once posts are live.
Settings → General

- Site Title: your blog’s name. Most themes show it at the top of every page and in the browser tab.
- Tagline: a short line on what the blog is about. It’s empty by default; write one, or your theme may show nothing.
- WordPress Address and Site Address: both should start with
https://. Don’t change them unless you know why; a wrong value can lock you out. - Administration Email Address: use an inbox you check. WordPress sends update, comment and error notices here, and asks you to confirm a new address by email before it takes effect.
- Membership: leave “Anyone can register” unticked. A blog doesn’t need public sign-ups.
- Timezone: choose a city in your time zone so scheduled posts go out when you expect.
Settings → Reading
Here you choose whether your home page shows your latest posts (the classic blog layout) or a static page, with your posts on a separate page. For a new blog, latest posts is simplest; switch later if you design a custom home page.
Then check Search engine visibility. The box “Discourage search engines from indexing this site” must be unticked, or WordPress asks search engines not to index the site. It’s the most common reason a new blog never appears in Google. Our WordPress SEO tutorial shows this screen and the rest of the SEO setup.
Settings → Discussion

Comments are where spam arrives first, so tighten them before you publish:
- Decide whether you want comments at all: “Allow people to submit comments on new posts” can be changed for each post later.
- Untick the pingback and trackback options unless you have a reason to keep them; most new blogs receive little but spam through them.
- Under “Before a comment appears”, tick “Comment author must have a previously approved comment”, so you approve each new commenter once.
- Keep “Hold a comment in the queue if it contains 2 or more links” on: link-heavy comments are a common sign of spam.
Settings → Permalinks
Permalinks are the permanent addresses of your posts. A new WordPress install uses Day and name (yourdomain.com/2026/10/12/sample-post/). Choose Post name instead (yourdomain.com/sample-post/) and click Save Changes. Short, dateless addresses are easier to read and share, and they don’t look old when you update a post. Do it now: changing the structure after posts are indexed means every old address needs a redirect.
While you’re in Settings, go to Posts → Categories and rename the default “Uncategorized” category to your main topic, so no post ends up filed under “Uncategorized”.
Step 5: Choose and install a theme
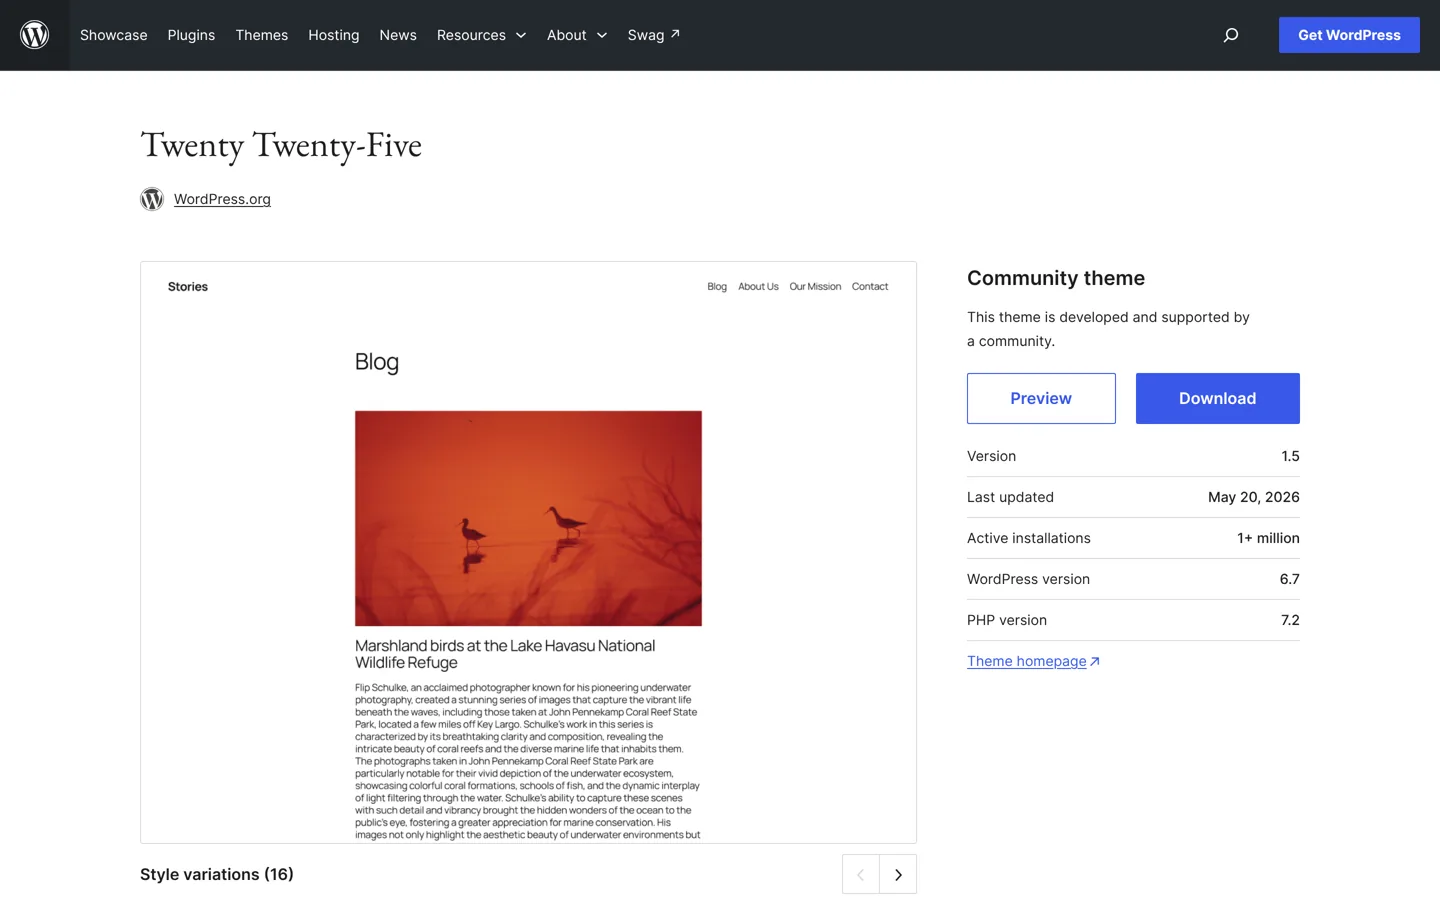
Your theme controls how the blog looks. WordPress 7.1 comes with the Twenty Twenty-Five theme active, which is a block theme: you edit its header, footer and templates in Appearance → Editor (the Site Editor) using blocks. Classic themes use Appearance → Customize and Appearance → Menus instead. Both work well; just know which kind you have, because the menu steps differ.
To install a theme, go to Appearance → Themes → Add Theme, search for it, click Install, then Activate. Before you activate, use Preview to see your own content in it.
What to look for in a blog theme:
- Fast and light: a theme that loads little code helps your Core Web Vitals.
- Readable: a clear text size, good contrast and a comfortable line length matter more than effects.
- Mobile-first: check the demo on your phone, not only on a laptop.
- Kept up to date: the theme page on WordPress.org shows when it was last updated.
Good free starting points are the default Twenty Twenty-Five, Astra, GeneratePress, Kadence and Blocksy. Our pick of the best WordPress themes compares them, how to choose a theme for your blog walks through the decision, and our Astra Pro review explains what the paid version adds. Don’t spend days on design: pick a clean theme and start writing.
Once your theme is active, delete the themes you don’t use from Appearance → Themes, keeping one default theme as a fallback.
Step 6: Add a few essential plugins
Plugins add features. Install them from Plugins → Add Plugin: search by name, click Install Now, then Activate. Every plugin is code you have to keep updated, so add only what a new blog needs:
| Job | Examples | Why |
|---|---|---|
| Comment spam | Akismet (comes with WordPress) | Filters spam comments. Its Personal plan is name-your-price for personal sites; commercial sites need a paid plan. |
| Backups | UpdraftPlus, or your host’s backups | A copy you can restore after a bad update or a hack. |
| SEO | Rank Math or Yoast SEO (one, not both) | Titles, meta descriptions and an XML sitemap. |
| Contact form | Contact Form 7 or WPForms | Readers can reach you without your email address being published. |
| Email delivery | WP Mail SMTP | Only if form and password emails don’t arrive. |
Caching and image compression are worth adding once you’re publishing regularly, but many hosts already include caching, so check before you install another layer. Our list of the best WordPress plugins covers each category in depth, our Yoast SEO setup guide walks through that plugin’s settings, and the Contact Form 7 guide builds the form for your Contact page. Also delete the plugins you won’t use from the Plugins screen; WordPress itself ships with Akismet and the small Hello Dolly plugin, which you can remove.
Step 7: Create your About, Contact and Privacy Policy pages
Pages are for content that doesn’t belong in the blog feed. Create them under Pages → Add Page, before your first post, so readers (and later ad networks and affiliate programs) can see who runs the blog.
- About: who you are, who the blog is for and why readers should trust you. Write it in your own voice and add a real photo.
- Contact: a short line on what people can contact you about, then the contact form from Step 6. Paste the form’s shortcode or add its block.
- Privacy Policy: go to Settings → Privacy. Choose the draft “Privacy Policy” page WordPress created and click Use This Page, or click Create under “Create a new Privacy Policy page”. The page comes with suggested text and a guide link; edit it to describe what your site really collects (comments, analytics, contact form, newsletter), then publish. WordPress’s documentation notes that keeping it accurate is your responsibility.
- Disclosure: if you’ll use affiliate links, add a page that says so in plain words, like our affiliate disclosure, and a short note near the links in each post.
Step 8: Build your menu
Your menu should get readers to your main topics and pages in one click. How you build it depends on your theme:
- Block theme (such as Twenty Twenty-Five): go to Appearance → Editor → Navigation, or open the header in the Site Editor and select the Navigation block. Add pages, category links or custom links, drag them into order, and save. A new Navigation block starts with a list of your pages.
- Classic theme: go to Appearance → Menus, create a menu, tick the pages and categories to add, drag them into order, choose the menu location (usually “Primary”) and click Save Menu.
A simple first menu: Home, your two or three main categories, About and Contact. Put the Privacy Policy and Disclosure links in the footer.
Step 9: Write and publish your first post in the block editor
Go to Posts → Add Post. The block editor opens full screen, with a toolbar at the top, your content in the middle and the settings sidebar on the right (the Settings icon shows or hides it). Everything in a post is a block: a paragraph, a heading, an image or a list.

- Add the title. Write a clear title that says what the post answers. Keep your main keyword near the start.
- Write in blocks. Press Enter for a new paragraph block. Type
/at the start of a new line to pick another block, such as/heading,/imageor/list; the + block inserter in the top toolbar does the same. - Structure it with headings. Use the Heading block for sections: H2 for main sections, H3 inside them. Don’t use H1, which is the post title. Document Overview → Outline in the top toolbar shows your heading structure and word count.
- Add images with alt text. Add an Image block, upload the picture, then fill in Alternative text in the block settings: a short description of what the image shows, for screen readers and search engines. Leave it empty only for purely decorative images. Compress images before uploading; our guide to compressing images with Optimizilla shows a free way.
- Link to sources. Select text and click the link icon (or press Ctrl+K / Cmd+K) to link to a source or another post.
- Choose a category and tags. In the sidebar under Post, pick one main category. Tags are optional; use a few or none.
- Set a featured image. Click Set featured image in the sidebar and pick or upload the image your theme shows on the blog page and when the post is shared.
- Check the slug and excerpt. The Slug becomes the post’s address with Post name permalinks; shorten it to the main words (for example
start-a-vegetable-garden). Add a one- or two-sentence Excerpt if your theme shows excerpts. - Preview. Click Save draft, then View to see the post on desktop, tablet and mobile. Read it once out loud; you’ll catch most mistakes.
- Publish. Click Publish. WordPress shows a final check panel; click Publish again. To publish later, change the date under Publish in the sidebar and the button becomes Schedule.
For writing help, see our tips to improve your article writing, and our on-page SEO checklist for what to check in every post.
Checks after you publish your first post
Spend fifteen minutes on these, once, and you’ll catch most setup problems early:
- Open the post on your phone. Check text size, images and the menu.
- Check the address. It should look like
yourdomain.com/your-post-name/, with https. - Click every link in the post, menu and footer.
- Send yourself a message through the Contact form. If it doesn’t arrive, fix email sending now (WP Mail SMTP or your host’s email settings), because password resets use email too.
- Run Site Health. Tools → Site Health lists critical issues and recommended improvements for your setup.
- Confirm a backup exists and that you know how to restore it.
- Connect Google Search Console and submit your sitemap, so Google finds new posts; our WordPress SEO tutorial walks through it.
Your blog’s next 30 days
Setup is done; now the blog needs posts and readers. This is the plan I’d follow in the first month:

- Week 1: connect Google Search Console, submit the sitemap and test restoring a backup.
- Week 2: do your keyword research and plan ten posts, each answering one real question your readers search for. Set up your main categories to match.
- Week 3: publish on a schedule you can keep, such as one post a week, and link each new post to two or three related ones.
- Week 4: add an email sign-up form (see how to get your first 1,000 email subscribers) and look at Search Console to see which searches already find you.
Keep WordPress, your theme and your plugins updated from Dashboard → Updates; updates fix security problems. When you’re ready to earn from the blog, our guide to earning money from a blog covers ads, affiliate links and your own products.
How to start a WordPress blog: the setup checklist
| Where | What to set |
|---|---|
| Users → Profile | Your name under “Display name publicly as” |
| Settings → General | Site Title, Tagline, admin email, Timezone; registration off; https addresses |
| Settings → Reading | Home page shows latest posts; “Discourage search engines” unticked |
| Settings → Discussion | Pingbacks off; first comments approved by hand; hold comments with 2+ links |
| Settings → Permalinks | Post name |
| Posts → Categories | “Uncategorized” renamed to your main topic |
| Appearance → Themes | One fast theme active; unused themes deleted, one default kept |
| Plugins | Spam, backups, one SEO plugin, contact form; nothing unused |
| Pages | About, Contact, Privacy Policy (Settings → Privacy), Disclosure if needed |
| Menus / Navigation | Main categories, About, Contact; legal pages in the footer |
| Tools → Site Health | No critical issues |
That’s the whole setup. For the bigger picture, including updates, security and every other WordPress topic on this site, see our WordPress guide for beginners. If you’d rather have a professional set the blog up for you, my company A Digital Motive does that kind of work; this guide gives you everything you need to do it yourself.
Questions people ask
How much does it cost to start a WordPress blog?
WordPress is free. You pay for hosting and a domain: on budget hosting such as Hostinger's Premium plan that's $2.99 a month on a 48-month term ($143.52 up front), with the domain free for the first year (prices checked 12 October 2026). Free themes and plugins are enough to start.
How long does it take to set up a WordPress blog?
About an afternoon for the setup: buying hosting, installing WordPress, the settings, a theme, plugins, pages and a menu. Writing a good first post takes another one to three hours.
Can I start a WordPress blog for free?
Not on your own domain: self-hosted WordPress is free software but needs paid hosting. To learn first without paying, you can run WordPress on your own computer or try it in your browser with WordPress Playground; neither is a public blog.
What permalink setting should a new WordPress blog use?
Post name, in Settings → Permalinks. It gives short addresses such as yourdomain.com/sample-post/. Set it before you publish; changing it after posts are indexed means redirecting every old address.
Why doesn't my new WordPress blog show up in Google?
First check Settings → Reading: "Discourage search engines from indexing this site" must be unticked. Then add the site to Google Search Console and submit your sitemap. New blogs can take days or weeks to be indexed.
Do I need a block theme or a classic theme?
Either works. Block themes, like the default Twenty Twenty-Five, are edited in Appearance → Editor with blocks; classic themes use Appearance → Customize and Appearance → Menus. Choose the theme you like that is fast and readable.
Which pages does a new blog need?
About, Contact and a Privacy Policy, plus an affiliate disclosure if you use affiliate links. WordPress creates a draft Privacy Policy page you can finish in Settings → Privacy.
Sources
- WordPress requirements wordpress.org · checked October 12, 2026
- Download WordPress (current version) wordpress.org · checked October 12, 2026
- Dashboard screen (WordPress.org documentation) wordpress.org · checked October 12, 2026
- Settings General screen wordpress.org · checked October 12, 2026
- Settings Reading screen wordpress.org · checked October 12, 2026
- Settings Discussion screen wordpress.org · checked October 12, 2026
- Settings Permalinks screen wordpress.org · checked October 12, 2026
- Settings Privacy screen wordpress.org · checked October 12, 2026
- WordPress block editor wordpress.org · checked October 12, 2026
- Post/page settings sidebar wordpress.org · checked October 12, 2026
- Image block (alt text) wordpress.org · checked October 12, 2026
- Navigation block wordpress.org · checked October 12, 2026
- Appearance Menus screen wordpress.org · checked October 12, 2026
- Site Health screen wordpress.org · checked October 12, 2026
- Twenty Twenty-Five theme wordpress.org · checked October 12, 2026

Building websites since 2006: 500+ web projects of every size and $300K+ in website deals sold or brokered. Founder of A Digital Motive and DigiFlippers. I share the whole process here, plainly.
Founder of A Digital Motive and DigiFlippers